Introduction:
In this blog post, we will discuss the process of repairing and replacing CAT wiring and connectors. CAT wiring and connectors are commonly used in various applications and are fairly universal. Understanding the basics of how to repair and replace these components can save you time and money.
1. Understanding CAT Wiring and Connectors:
CAT wiring and connectors, also known as Deutsch or Amp Seal connectors, are widely used and have standardized pins and sockets. These connectors are typically referred to as “boyd” connectors and are easy to work with due to their universal design.
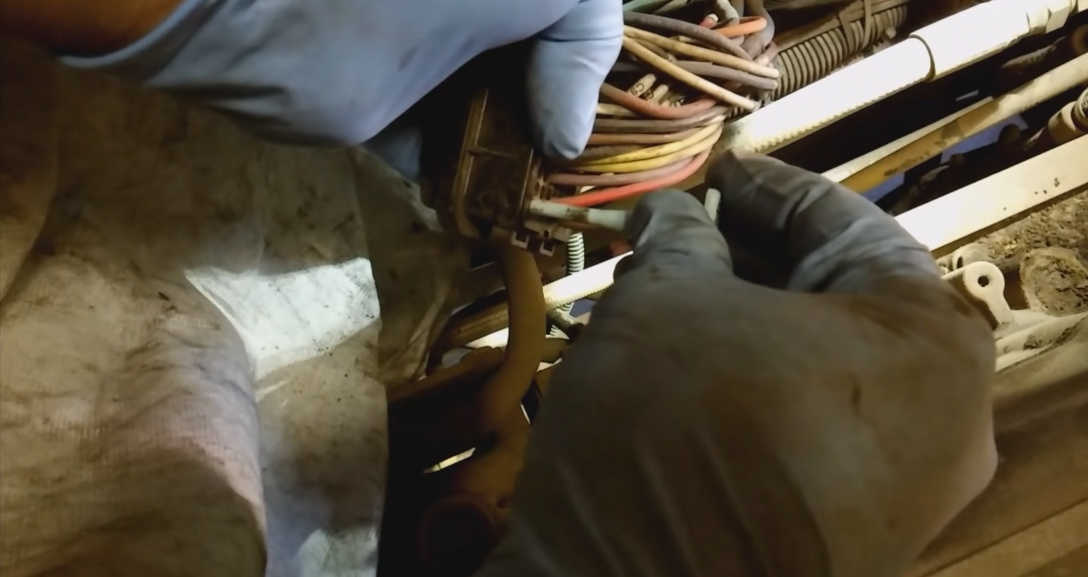
2. Removing the Connector:
To remove a connector or a pin/wire from it, start by disconnecting it from the sensor. Next, remove the plastic retaining cap to reveal the metal socket contact points. Press down slightly on the plastic retaining tangs under the socket to release the wire from the back. This is the correct way to remove the wire without damaging the connector.
3. Repairing the Wiring:
If you need to repair the wiring or run a new wire from the engine control module (ECM), follow the same steps mentioned above. Make sure to reinsert the wire into the connector and secure it with the retaining cap. This will prevent the pins from falling out and causing a check engine light.
4. Dealing with ECM Connectors:
Repairing or replacing wires in ECM connectors can be more challenging, as the connector itself does not disassemble easily. To remove a pin or socket from an ECM connector, you will need a removal tool. The color of the removal tool corresponds to the wire size, with blue being the most commonly used for CAT wiring. Insert the removal tool behind the wire and pull on it while leaving the tool in place. The wire should dislodge itself from the connector.
5. Installing a New Wire:
To install a new wire, simply insert it into the same hole in the connector and it will lock in place. The self-locking mechanism ensures that the wire cannot be pulled out by hand, providing a secure connection. However, always remember to use the removal tool to remove the wire when needed.
6. Crimping and Soldering:
When working with CAT pins and sockets, it is crucial to use proper crimping tools. Strip about 3/8 of an inch off the end of the wire and insert it into the small hole in the socket. Use a specialized crimping tool designed for CAT connectors to create a strong connection. Soldering can also be used for added durability.
7. Repair Kits for Special Connectors:
Certain components like injectors and solenoids use different pins and sockets than the standard CAT wiring. For these cases, crimp-on repair kits are available. These kits allow you to cut off the damaged end of the wire and replace it with a new terminal using heat shrink and crimp terminals or soldering.


Conclusion:
Repairing and replacing CAT wiring and connectors may seem daunting at first, but with the right tools and knowledge, it can be a manageable task. By following the steps outlined in this guide, you can save time and money by avoiding the need to replace entire harnesses. Remember to use proper crimping tools and consider repair kits for specialized connectors. Happy repairing!
For more Caterpillar repair,please refer to Caterpillar trouble repair.